
Learn how to crochet this quick and easy crochet braided beanie hat. Designed to have lots of texture, this beanie will quickly become a Fall/Winter favourite.
This free crochet beanie hat pattern is accompanied with a video tutorial. Please scroll to the end.
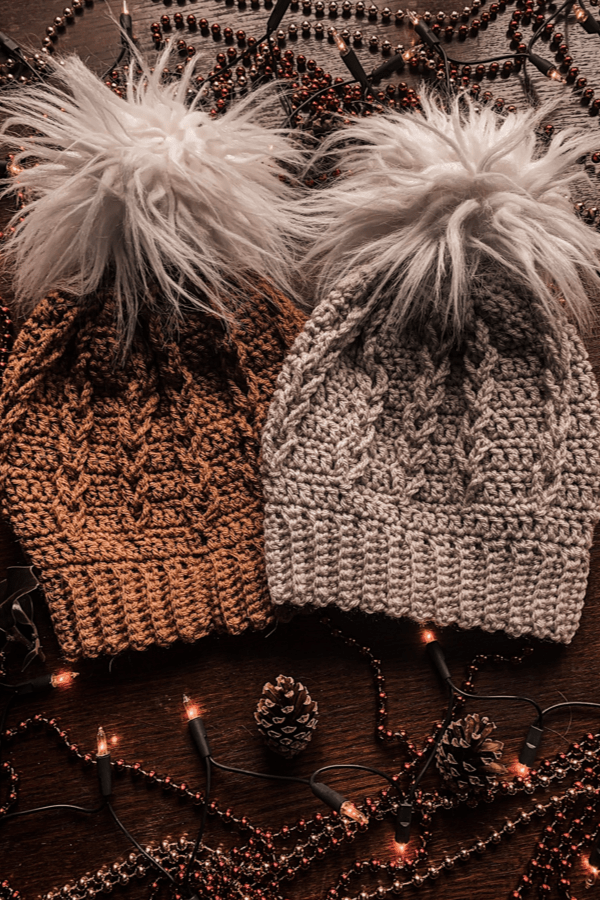
This crochet braided beanie hat really is the perfect beanie to wear during the cold and breezy months ahead. Created with lots of texture and designed in a way that is so simple yet the end outcome is so stunning.
The had is crochet by first starting at the ribbed brim, then we stitch the two ends of the ribbed brim together to create a circle. Once stitched, we will then crochet along the edge of the brim creating the body of the crochet beanie hat. Once we are happy with the height of the beanie hat we will do a very minimal amount of decreasing before closing the top of the beanie hat.
The body of the beanie hat will have lots of loops throughout that we will weave together to create the braiding effect. So if you like the idea of cables but find them too difficult to master, I think this crochet braided beanie hat is the perfect project for you.
YARN
This crochet braided beanie hat pattern uses Lion Brand Vanna’s Choice. In the photo I used the colour Honey and Linen. This yarn is a weight 4 acrylic yarn and comes in a large selection of colours.
SIZING
I designed this hat to fit an adult sized hat, however it can easily be customised to fit other sizes. Begin by making the ribbed brim large enough to fit the head, then when it comes to the body of the hat, you will crochet in multiples of 5 stitches
MATERIALS
** These materials contain affiliate links for which I make a small commission. It is at no extra cost to you but it helps me out, and makes shopping easier for you **
Yarn – Lion Brand Vanna’s Choice – weight 4/aran/medium/10 ply
Approximately 170 yds/ 156 m/ 100 g
5.5 mm crochet hook
6 mm crochet hook
Yarn needle
Pom pom (optional)
STITCHES & ABBREVIATIONS
Ch = chain
sc = single crochet
dc = double crochet
slst = slip stitch
sc2tog = single crochet two together
BLO = back loop only
PIN IT FOR LATER!
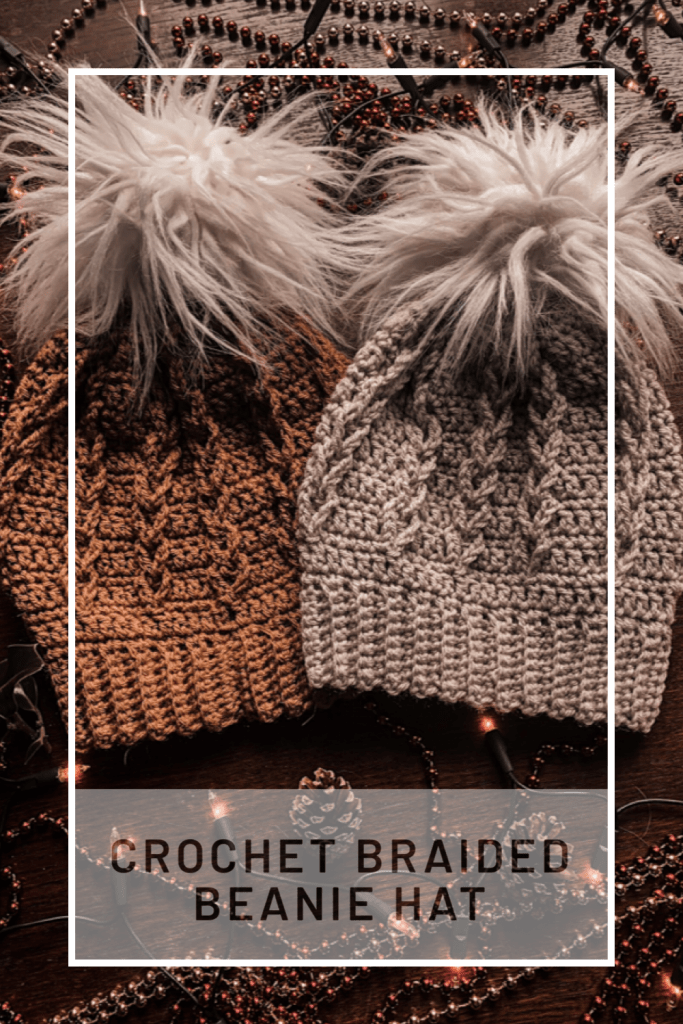
CROCHET BRAIDED BEANIE PATTERN
Using 5.5 mm crochet hook
Ch 9
Row 1: sc in 2nd ch from hook, sc to end. Turn.
Row 2: ch 1, sc in BLO across. Turn.
Rows 3-55: repeat row 2.
Slip stitch the two ends together to create a circle. Then turn inside out so the seam is in the inside.
Change to 6 mm crochet hook
Next round: ch 1, sc 55 sts evenly around the brim of the hat. Slst to first sc to close the round.
Next round: ch 3 (counts as first dc), make 4 dc, ch 10, slst on top of last worked dc, *5 dc, ch 10, slst on top of last worked dc, repeat from * all the way around, slst to top of ch3.
Next round: ch 1, sc in same space, sc 54 sts around making sure to push the ch 10 loops forward as you work along. Slst to 1st sc to close the round.
Repeat last two rounds until your beanie reaches a height of 9 inches. Add more rows here for a slouchier look but make sure to end on the single crochet round.
Next round: ch 3 (counts as first dc), dc 54 around. Slst to top of ch3.
Now we will weave the loops to create the braided effect. Begin at the bottom and pick one loop, then take the loop directly above that and feed it though the bottom loop. Contine all the way up along the hat. When you reach the top leave the loop standing. Return to the bottom of the hat again and weave the loops all the way up along to the top. Repeat all the way around hat.
Next round: ch 1, sc in same space, sc in next 3 sts, *sc through the ch 10 loop and next dc at the same time. Then sc in the same loop again and throught the next st at the same time, sc in next 3 sts, repeat from * repeat all the way around. At the end of the round make your last slst though the last ch 10 loop and the first sc of the round at the same time.
Next round: ch 1, sc in same space, sc2tog, *sc in next stitch, sc2tog, repeat all the way around. Slst to first sc to close round.
Next round: repeat last round.
Now fasten off leaving a long tail. With you long tail and yarn needle weave in and out of every stitch all the way around the top of the beanie. Then pull yarn tight and this will close the top of the hat. Secure with a few stitches.
Add a pom pom and you are ready to go!
Can’t wait to make you braided beanie. My granddaughter will love it! Thank you for wonderful patterns.
Starting this beanie!
Love this style of pom poms. Where can I purchase?
Thank you I will enjoy making theses
Love the texture and look of this beanie.
Carrie,
This was fun to make. God gave you a very creative mind.
Thanks for sharing this with all of us!
Mine came out súper lose 😭 almost always happens a and I followed the pattern to the T.
where can i purchase the pompoms?
I made them myself from an old faux fur cushion cover! I’m sure you could find some really nice ones on Etsy though.
Hi Carrie, could you tell me the size circle you made for your pom?
Do you by chance have a nice scarf pattern that would match this? I think it would make a lovely Christmas gift!
Hi Carrie, I love your patterns! I am left-handed, and have never had a problem following your instructions. However, on this one, at the end of the ‘loop’ round, it says ‘turn’. In the video it didn’t look like you turned the work; can you clarify, please? Thank you so much!
Thank you so much for pointing that out to me. There is no turn. Thank you once again.
Hi! I love the look of this pattern! I was halfway completed when I realized my braid loops are going diagonal. What am I doing wrong? 🙁
Mine are going diagonal as well! Did you figure out the issue? I can’t seem to! Thanks
Hi I am also left handed and I’m having a problem. When I do the chain 10 to make the loop when I slip stitch it to the previous double crochet the loop seems to want to lay towards the inside instead of the outside. If that makes sense. Can you tell me how you do yours? Any help would be greatly appreciated.
Pull the loop to the outside before making your next stitch
When you make your loop pull it to the front before doing your next stitch
Merci à vous pour ce tuto
Enfin avec une traduction en français ! Ce qui est rare Très beau bonnet ! Merci
Hi! Love this pattern snd going to give it a try! Will you share where you got the pom poms? All the ones I find are big and puffy. Thank you so much!
As a lefty: after the single crochet round, slip stitch to the 1st sc, then slip stitch one more time. This will help align your loops. (You basically pushed your loop over one stitch without losing a stitch). Then use that slip stitch as your last loop of the round.
Great pattern. I have just finished the cardigan and I wanted a matching hat so my wish came true.
Hello Carrie:
I love this braided hat pattern – could you please provide a gauge for this. It is difficult getting vannas choice yarn here in south Florida in the United States. I have used other yarns but then have to increase the band stitches from 55 to 75. Please advise. Thank you
As long as you are doing multiples of 5 for the band your count will come out right
I don’t think the Vanna’s yarn has anything to do with it. I just started the headband and I don’t see how in the world 55 rows would fit any adult head, and will also have to increase rows. I have made other hats with headbands like this, and the are all 60 to 70 rows. I am surprised that your’s is the only mention of this. I even looked back at the directions to see if this was child sized. I am now having doubts about continuing the patter, as this is so blatently off.
Made it and loved it!!!
Thank you for this beautiful pattern 🙂
Making this beanie in a Lapis Blue to wear with my Navy Blue bad weather, winter coat. Can’t wait!
thanks love this site
How many loops should I have around the hat?
Multiples of 5
Using alpaca 3 ply worsted and suggested hook. The brim is to small. Do I just increase at 5 stitch increments to get it the right fit?
yes
I just finished this in gray and added a black fur pompom. I LOVE this pattern and the accompanying video made is so easy to follow. Thank you!
What size this this hat? I love it.
Thank you so much for sharing your beautiful pattern’s.
Merci à vous pour ce tuto
Enfin avec une traduction en français ! Ce qui est rare Très beau bonnet ! Merci
Hello, I made this hat for myself and have had several compliments so thank you very much for sharing this pattern. I would like to make this for my niece she is turning eleven-years-old. I’m wondering if 45 rows would be too small. Please advise. Thank You!!
Do you have a print version of this. With all the ads I find trying to print it to be a nightmare.
Joesy