Pincushion Idea

I needed a new pincushion.  My old one was getting ratty and I had it setting in a small butter tub.  I liked the way it fit and the fact that I could lift it and store any notions needed on a current project.

I hot glued material to cover the tub – it didn’t fit perfectly because the tub does slant inward.  I may put darts in a future pincushion.  I folded a piece of the same material in half, traced around the top of the tub and cut the two pieces out.  I repeated that with another piece of material folded in half.

Putting the right sides together on two of the pieces, I stitched about 1/4″ on the OUTSIDE of the line around 3 sides.  Putting the right sides together on the other two pieces, I stitched about 1/4″ on the INSIDE of the line around 3 sides.

Then I clipped the edges and turned the pieces right side out.  I filled them with stuffing and hand sewed the open edges shut.  That is all there was to it!

Below is the first video I’ve ever done (and boy, does it show!), but it displays how it fits together.


Handy Dandy How-To Crochet Links

Running to google every time I need to figure out how to do something gets to be a real pain, so I put a page in my OneNote combining all the links I use into one place, and I thought I would share them with you.  Let’s start at the very beginning; just click on the highlighted link! (Note:  I have made an effort, wherever possible, to include links without phishing or clickbait – please comment if you find any!  It is practically impossible to include only sites without any affiliate links however, but I tried to find sites where they are minimal.) These links are only for how to crochet links; over the next few posts, I will be talking about designers, yarn companies, etc)

  •  First is learning crochet stitches.  You can find basic to advanced stitch instruction at Annie’s.
  • Reading a pattern is essential; the Yarn Craft Council has a good guide.
  • You don’t have to learn diagrams/charts/graphs but a lot of great patterns use them.  Craftsy shows you how.
  • You can learn about yarn at the Encyclopedia.com.
  • Herrschnerr’s has an article on yarn weights; handy for planning projects.
  • You don’t always have access to the yarn called for in a pattern – Yarn Sub makes substitution easy.
  • One of my favorite designers, Dedri Ulys (Sophie’s Universe), has written a super article on crochet hooks.

Yarn, hooks, pattern, stitches – what’s next?   Really important is planning the color pattern or progression.  It can be super difficult for me, so I am always looking for help. Most sites describe colors palettes with Stylecraft yarns, but I find that once I see the palette, I can find similar colors in the yarn of my choice.

  • Another favorite designer, Emma Goodgion (Pippin Poppycock), is particularly adept at yarn mood boards.
  • Blanka made this tool that will let you look at the colors of Stylecraft and Paintbox yarns yourself.

Looking for a pattern now?  There is only one perfect place to start, and that is Ravelry.  Whether you are looking for a doily pattern out of the finest thread, or a granny afghan, you will find a pattern here.  If you have never used it before, you should click on patterns on the home page.  You can type what you are looking for into the search pattern box or you can browse through the categories.

You can refine your searches to find only patterns with pictures, only free patterns, only crochet patterns, or whatever parameters suit you.

Once you have the basics down, and a pattern picked, there are a few advanced techniques you might want to learn.  For instance, if you are working in the round and don’t want that hole in the center, you might want to try the magic circle.  (Note: I like to wrap the yarn/thread around my fingers twice, for the most secure ring!)

If you are starting with a long chain, the chainless foundation row is amazing. Lion Brand has a video by Maggie Weldon.

In a few days I will be adding things like care of your project and blocking.  Until then, happy hooking!


Crochet Abbreviations Master List

From the yarn council:

Following is a list of crochet abbreviations used in patterns by yarn industry designers and publishers. In addition, designers and publishers may use special abbreviations in a pattern, which you might not find on this list. Generally, a definition of special abbreviations is given at the beginning of a book or pattern. These definitions reflect U.S. crochet terminology.

Abbreviation Description
alt alternate
approx approximately
beg begin/beginning
bet between
BL or BLO back loop or back loop only
bo bobble
BP back post
BPdc back post double crochet
BPdtr back post double treble crochet
BPhdc back post half double crochet
BPsc back post single crochet
BPtr back post treble crochet
CC contrasting color
ch chain stitch
ch- refer to chain or space previously made, e.g., ch-1 space
ch-sp chain space
CL cluster
cont continue
dc double crochet
dc2tog double crochet 2 stitches together
dec decrease
dtr double treble crochet
edc extended double crochet
ehdc extended half double crochet
esc extended single crochet
etr extended treble crochet
FL or FLO front loop or front loop only
foll following
FP front post
FPdc front post double crochet
FPdtr front post double treble crochet
FPhdc front post half double crochet
FPsc front post single crochet
Abbreviation Description
FPtr front post treble crochet
hdc half double crochet
hdc2tog half double crochet 2 stitches together
inc increase
lp loop
m marker
MC main color
pat or patt pattern
pc popcorn stitch
pm place marker
prev previous
ps or puff puff stitch
rem remaining
rep repeat
rnd round
RS right side
sc single crochet
sc2tog single crochet 2 stitches together
sh shell
sk skip
sl st slip stitch
sm or sl m slip marker
sp space
st stitch
tbl through back loop
tch or t-ch turning chain
tog together
tr treble crochet
tr2tog treble crochet 2 stitches together
trtr triple treble crochet
WS wrong side
yo yarn over
yoh yarn over hook

Tunisian Abbreviations

Tunisian crochet is also commonly known as Afghan Crochet. It has also been called by a variety of other names including Shepherd’s Knitting, Railroad Knitting and Cro-hooking.

Abbreviation Description
etss extended Tunisian simple stitch
FwP forward pass
RetP return pass
tdc Tunisian double crochet
tfs Tunisian full stitch
thdc Tunisian half double crochet
tks Tunisian knit stitch
tps Tunisian purl stitch
trs Tunisian reverse stitch
tsc Tunisian single crochet
tss Tunisian simple stitch
tslst Tunisian slip stitch
ttr Tunisian treble crochet
ttw Tunisian twisted

Abbreviation & Term Differences between the U.S., United Kingdom (U.K.) and Canada.

U.S./Canada U.K.
slip stitch (sl st) slip stitch (ss)
single crochet (sc) double crochet (dc)
half double crochet (hdc) half treble (htr)
double crochet (dc) treble (tr)
treble (tr) double treble (dtr)
double treble (dtr) triple treble (trtr)
U.S. U.K./Canada
gauge tension
yarn over (yo) yarn over hook (yoh

Copied directly from the Yarn Council.

Cornucopia


I love the little cornucopias I see on trees, filled with tiny presents or bits of evergreen and berries, so I experimented with a few styles. Still, they are all based on a granny square with an extra round on two sides only with a join up the other two sides.

MATERIALS

I’ve used several different materials, and you can use whatever you like, to get whatever size you want. My personal favorite is a size 8 crochet thread with a US size 4 steel hook (which Annie’s says is a 2mm). It is about 4” in length, from the bottom to the uppermost corner.

TIPS

  • When crocheting the first round of a granny square, if you pick up the tail of the thread and crochet it into one of the dcs, it will prevent your center chain/circle from becoming too large.

  • Turning your granny square each round will help it to stay beautifully squared. It is not essential to do so though, if you are more comfortable working it in the conventional way.

ABBREVIATIONS

  • sl st Slip Stitch

  • dc Double Crochet

  • ch Chain Stitch

  • beg Beginning

  • Shell Shell Stitch (3dc, ch 2, 3d) (this is also the corner pattern)

PATTERN #1

Made with Alize Miss Batik 3724, steel hook size 4 (2mm)

  1. Ch 4 [this is your beginning dc and a chain into which the rest of the round will be worked], 2 dc into beg ch, (ch 2, 3 dc into same beg ch) X 3, ch 2, join to top of ch 3 with sl st

    [Four 3dc sets, separated by ch 2 spaces]

  2. Turn square over, ch 3 [this is the 1st dc, now and throughout the pattern], 2 dc into the joining ch 2 space, (ch 1, 3dc, ch 2, 3 dc into next ch 2 space) X 3, ch 1, 3 dc, ch 2 in beg ch 2 space, join with sl st to top of beg ch 3

    [Four 3dc, ch 2, 3 dc sets, separated by ch 1 spaces]

  3. Turn square over, ch 3, 2dc into joining ch 2 sp, (ch 1, 3 dc into ch 1 sp, ch 1, 3 dc, ch 2, 3dc into ch 2 corner space, ch 1) X 3, ch 1, 3 dc, ch 2 in beg ch 2 space, join with sl st to top of beg ch 3

    [Four 3 dc, ch 2, 3 dc corner sets, eight ch 1 sp, four 3 dc sets]

  4. Turn square over, ch 3, 2dc into joining ch 2 sp, (ch 1, 3 dc into ch 1 sp, ch 1, 3d into ch 1 sp, ch 1, 3 dc, ch 2, 3dc into ch 2 corner space, ch 1) X 3, ch 1, 3 dc, ch 2 in beg ch 2 space, join with sl st to top of beg ch 3

    [Four 3 dc, ch 2, 3 dc corner sets, twelve ch 1 sp, eight 3 dc sets]

5.  Ch 3, work 1 shell into each ch 1 sp across, in corner work [2 dc, ch 2, 2 dc, ch 2, 2dc], work 1 shell into each ch 1 sp across next side, 1 dc into corner.

Note: You have only worked 2 sides

[six shells, three 2 dc separated by 2 ch in middle corner, 1 dc in beg and end corners.]

6.  Fold the square in half, and crochet or whip stitch the 2 plain sides together. Close off at the end with a sl st into the base corner.         I didn’t have any little presents, but I did have some miniature bottles and clothespins to fill my cornucopia with!

Black Eyed Susan


I used a #5-ish crochet thread (Herrschnerr’s Brand Value packs, stated as #10, but they are really thick, much more like a 5 or 8) in yellow and black and a #5 steel hook.

Note to testers: I think the center may be too high, perhaps removing rnd 3?

CENTER

  1. With black into a magic circle, sc 12, join with ss to beg sc

    [12 sc]

  2. 2 Sc into ea st around, join with ss to beg sc

    [24 sc]

  3. sc in each st around, finish off with ss to beg st

    [24 sc]

  4. With yellow, sc in each st around, join with ss to beg st (do not finish off)

    [24 sc]

PETALS (Make 12)

  1. bpsc around 1st sc in rnd 4 of center, ch 8, sc in 2nd ch from hook and each sc down, ch 1

    [7 sc, 1 ch]

  2. Working up the other side of the chain, sc in the back side of 6 ch, (sc, dc) in last ch

    [7 sc, 1 dc]

  3. sc in each sc back down the petal, ss into the same sc of the center that in which you started

    [7 sc, ss]

  4. skip 1 sc, ss into next and repeat 1-3 for next petal

    Repeat 1-4 until you have 12 petals. Ss to 1st petal to finish.

Cone Flower


I used a #10 crochet thread in russet and lavender with a #5 steel hook

dec hdc: hdc decrease over two stitches

CONE (Russet)

  1. Into a magic circle, 10 sc, join with ss to beg sc

    [10 sc]

  2. 2 hdc in each stitch around, join with ss to beg sc

    [20 hdc form the base of the cone]

  3. bphdc in each stitch around, join with ss to beg hdc

    [20 bphdc form the wall of the cone]

  4. hdc in 1st two st, dec over two st, (hdc in 2 st, dec over two st) X 4, join with ss to beg hdc

    [10 hdc. 5 dec hdc]

  5. hdc in 1st st, dc over two st, (hdc in st,dec over 2two st) X 5, join with ss to beg hdc

    [5 hdc, 5 dec hdc]

  6. (dec over two st) X 5, do not join

    [5 dec hdc]

  7. dec over two st around until you can close cone

PETALS (lavender)

Flip the cone over and work in the last round of the base

  1. ch 9, working back down the ch: ss in 1st ch, sc in 2 ch, hdc in 3 ch, sc in 3 ch, ss into beg sc

    [2 ss, 5 sc, 3 hdc]

  2. Do this in ea of the 20 stitches for 20 petals
  3. Turn the flower over and ss around the base

Petunia


I used a green, lavender and purple #10 crochet thread with a #5 steel hook

  1. Into a magic circle, hdc 10, finish off with ss in beg sc [10 hdc]
  2. 2 hdc in each hdc around [20 hdc]
  3. hdc in 1st sc of rnd 2; 2 hdc in next hdc; 1 hdc; fpdc into 2nd sc of rnd 1; hdc into next; [you have not skipped the hdc behind the fpdc], (hdc; 2 hdc in next; hdc, skipping 1 sc of rnd 1, fpdc into next; hdc) X 4; join with ss to beg[30 hdc, 5 fpdc]
  4. hdc into 1st hdc of rnd 3, hdc in next 3; (fpdc into fpdc of rnd 3, 4 hdc  [you have not skipped the hdc behind the fpdc]) X 3; fpdc into fpdc of rnd 3; hdc; join to beg hdc and finish off. [35 hdc, 5 fpdcYour work will begin to curl up, just as a real petunia would.
  5. With lavender, hdc into the hdc before the beg hdc of rnd 4; hdc into next 4 hdc, (fpdc into fpdc, hdc into next 4 hdc) X 4, fpdc into last fpdc; join to beg hdc [40 hdc, 5 hdc]
  6. ss to 3rd hdc of rnd 5, hdc, 3 dc, hdc in same st; (hdc, dc, fptrc, dc, hdc into fpdc; hdc, skip 2 hdc, hdc, 3 dc, hdc into next) X 4, hdc, dc, fptrc, dc, hdc into last fpdc, join to beg hdc, finish off [20 hdc, 25 dc, 5 trc]


Daisy


There are many types of Daisies, including Asters, Ragweed, and Sunflowers. I have tried to replicate the simple white daisy with a yellow center. The flower represents innocence, purity, new beginnings, and secrets.

I used #10 crochet thread in yellow and white, with a #6 steel hook.

Written in US terms.

Abbreviations:

Beg – Beginning

Ch – Chain

Sc – Single crochet

Sl st – Slip stitch

Sk – Skip

The center:

I did not originate this center, and tried to find it to give the designer credit – but I don’t remember what it is called.  This is how I make the center:  wrap the yellow thread around a larger hook [J or K / 6 or 6.5 mm] 15-20 times.  Then very carefully slide the wrapped thread off the hook, and holding it tightly together with your left hand, begin to sc into the center hole. [About every 5 sc, I slide them closer together, so there are no gaps.]  You want to get at least 31 sc into that ring to give it that slightly puffy look. If you can fit in more, do so in increments of 4 + 3  so 31, 35, 39 etc.  If you use a yarn, it may even fill in the center entirely, but it is more difficult to do with thread.  Finish off with a sl st into the first sc.

.

Note, my yellow is much brighter, but is a very gray day.  The center of a daisy should be bright!

The Petals

  • With white, into any sc in ring: ch 9, and working back down the chain: sl st into 2nd ch from hook, sc in next 2 ch, hdc in next 3 ch, sc in last 2 ch, ss into beg ss.   Skip three sc in ring,  sl st into next sc in ring.  The idea is to get petals evenly spaced around the ring, skipping 3 sc each time.  Attach with sl st to the beginning sl st to finish this round. In this example, I have 39 sc in a ring, and 10 evenly spaced petals, but the number of petals in nature can differ, and so can yours!

Now you will be adding another row of petals, working into the front post of the middle sc of the set of 3 skipped sc in the previous row.  Now that’s a mouthful!

  • Skip the petal just made and the sc, sl st around the front post of the next sc from the previous round.  (This is the middle sc of the set of 3 sc) and continue to create the petal just as previously.  Make one petal in the middle sc of each of the skipped sets of 3 sc.  You should have the same number of petals as in the previous round, but in between them and slightly in front.  Finish off with a sl st into the beg sl st.

You can block your flower if you wish, or not.  I dampened mine to straighten the petals slightly


Granny’s Heart


EDIT:  I just realized this is very similar (although not as nice looking) as one done on Bella Crochet.  You can find her pattern here.  (and I am quite sure her pattern is easier to follow!

Turning a simple granny square into a heart

The first picture is done in Aunt Lydia’s #10 crochet thread, the 2nd is done in a worsted weight yarn.

  1.  Into a magic ring, ch 3 [for 1st dc], 2 dc, ch 2, 3 dc, ch2, 3dc, ch 2, 3 dc, ch 2,  join to beg ch 3, turn  [3 dc per side, 2 ch between each set]
  2. Into the 1st ch 2 sp:  ch 3 [for 1st dc], dc, (dc in each of next 3 dc, in ch 2 sp: 2 dc, ch 2, 2 dc) X 3, dc in last 3 dc, 2 dc in 1st ch 2 sp, ch 2, join to beg ch 3  [5 dc per side, 2 ch between each set]
  3. [Working on one side only]:  SS to 2nd dc, [ch 1, dc] X 5 into the 4th dc of side, ch 1, ss into 6th dc of side, ss into ch 2 sp of same side, turn [5 dc, 10 ch 1 spaces]
  4. [Still working on same side] (ch 1, dc, ch 1, dc, ch 1) into each of next 5 ch 1 spaces, ss into ch 2 sp of round 2 [10 dc, 15 ch 1 spaces]
  5. [Working on next side]: repeat round 3 and 4, turn after final ss.
  6. sc in each stitch and chain around 1 side of heart, in bottom corner sc, ch 2, sc, sc in each stitch and chain around 2nd side of heart.
  7. Add embellishment to center

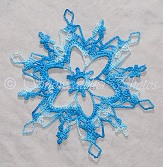
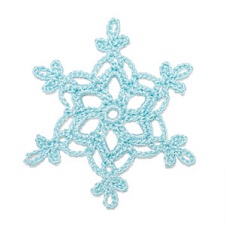
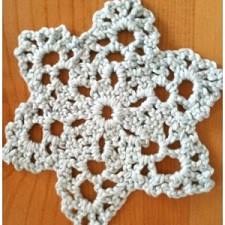
January Snowflakes


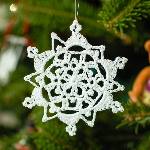
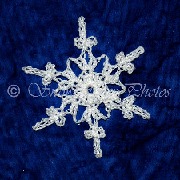
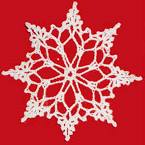
01/01/18 1 Pretty Picot Snowflake https://www.petalstopicots.com/2013/01/pretty-picot-snowflake-pattern/
01/07/18 2 Snowcatcher Aspen Snowflake http://www.snowcatcher.net/2016/08/snowflake-monday_15.html
01/07/18 3 Crochet Crowd Easy Snowflake http://thecrochetcrowd.com/crochet-snowflake/
01/14/18 4 Maggie Weldon Snowflake http://www.bestfreecrochet.com/2010/11/18/snowflake-christmas-ornament-free-crochet-pattern/
01/14/18 5 Snowcatcher Gray’s Peak Snowflake http://www.snowcatcher.net/2012/01/snowflake-monday_16.html
01/21/18 Auvergnasse_small Lion Brand Auvergnasse Snowflake http://www.lionbrand.com/stitchfinder/crochet-snowlafe-auvergnasse/
01/21/18 7 Knitshop Let It Snow Snowflake http://www.knitshop.co.uk/knitshop-pattern/1972-free-pattern-let-it-snow-snowflake.html
01/28/18  Attic 24  http://attic24.typepad.com/weblog/crochet-snowflake.html
01/28/18  Sally V. George  http://botherthebirds.com/wp-content/uploads/2012/12/snowflakes.pdf